Installation: Difference between revisions
No edit summary |
|||
| (27 intermediate revisions by the same user not shown) | |||
| Line 1: | Line 1: | ||
[[Category:Commander4j]] | |||
== Install Database == | == Install Database == | ||
| Line 15: | Line 16: | ||
* Ensure that the user is allowed to connect remotely (mySQL) | * Ensure that the user is allowed to connect remotely (mySQL) | ||
== [[MariaDB]]== | |||
Installation is fundamentally as per mySQL - however when you use the Setup4j program within Commander4j you need to make sure you select the following settings. | |||
Collation utf8mb4_general_ci | |||
Char Set utf8mb4 | |||
== [[MS SQL|Microsoft SQL Server]] == | == [[MS SQL|Microsoft SQL Server]] == | ||
| Line 29: | Line 35: | ||
== [[Oracle]] == | == [[Oracle]] == | ||
A detailed guide showing how to install Oracle under windows can be found [ | A detailed guide showing how to install Oracle under windows can be found [https://docs.oracle.com/en/database/oracle/oracle-database/23/install.html here]. | ||
* Create a database/schema user account for Commander4j to use. | * Create a database/schema user account for Commander4j to use. | ||
* Create a user which has the newly created database as it's default schema. | * Create a user which has the newly created database as it's default schema. | ||
| Line 39: | Line 45: | ||
== Install Java == | == Install Java == | ||
* | * Java 21 is needed if you're installing | ||
Recommend installing the JDK. | **Desktop Application into a Linux operating system. | ||
**Web components onto a server using Apache Tomcat. | |||
'''Note that the web applications should be installed on a nominated server machine and not on workstations''' | |||
Recommend installing the JDK. | |||
== Install Tomcat | == Install Tomcat 11.x == | ||
* Download from [http://tomcat.apache.org/ Apache Tomcat Site] | * Download from [http://tomcat.apache.org/ Apache Tomcat Site] | ||
Ensure you download the 32/64Bit Windows Service Installer package. | Ensure you download the 32/64Bit Windows Service Installer package. | ||
| Line 51: | Line 62: | ||
On a server select the "Full" install option from the setup screen - normally a users PC will require the "Workstation" install. | On a server select the "Full" install option from the setup screen - normally a users PC will require the "Workstation" install. | ||
[[File:Install1.png|border|400px]] | [[File:Install1.png|link=|border|400px]] | ||
<br> | <br> | ||
Run the appropriate installer for your operating system. | Run the appropriate installer for your operating system. | ||
| Line 59: | Line 70: | ||
Review and agree the licence agreement. | Review and agree the licence agreement. | ||
<br><br> | <br><br> | ||
[[File:Install3.png|border|400px]] | [[File:Install3.png|link=|border|400px]] | ||
<br> | <br> | ||
Select the install destination. | Select the install destination. | ||
<br><br> | <br><br> | ||
[[File:Install4.png|border|400px]] | [[File:Install4.png|link=|border|400px]] | ||
<br> | <br> | ||
Choose the appropriate install type. | Choose the appropriate install type. | ||
Select Full if your installing the main machine (server) which will run the interfaces and select Workstation for every other machine. | Select Full if your installing the main machine (server) which will run the interfaces and select Workstation for every other machine. | ||
<br><br> | <br><br> | ||
[[File:Install5.png|border|400px]] | [[File:Install5.png|link=|border|400px]] | ||
<br> | <br> | ||
Amend the name of the folder shortcut if needed. Typically you would change the name if you wanted to install more than one copy of the software on the same computer. | Amend the name of the folder shortcut if needed. Typically you would change the name if you wanted to install more than one copy of the software on the same computer. | ||
<br><br> | <br><br> | ||
[[File:Install6.png|border|400px]] | [[File:Install6.png|link=|border|400px]] | ||
<br> | <br> | ||
Allow the installer to copy files to the destination. | Allow the installer to copy files to the destination. | ||
<br><br> | <br><br> | ||
[[File:Install7.png|border|400px]] | [[File:Install7.png|link=|border|400px]] | ||
<br> | <br> | ||
The software is now installed. | The software is now installed. | ||
| Line 82: | Line 93: | ||
== Configure Commander4j == | == Configure Commander4j == | ||
* Setup Hosts (Database Connections) | * [[Setup4j|Setup Hosts]] (Database Connections) | ||
When commander is initially installed you will find a number of dummy database connections are already defined. You may find it easier to amend one of these rather than create a new connection. To manage the database connections you should run [[Setup4j]] from the Commander4j program shortcuts. | When commander is initially installed you will find a number of dummy database connections are already defined. You may find it easier to amend one of these rather than create a new connection. To manage the database connections you should run [[Setup4j]] from the Commander4j program shortcuts. | ||
== Configuration == | == Configuration == | ||
| Line 90: | Line 101: | ||
== Configure Tomcat / Web Application == | == Configure Tomcat / Web Application == | ||
The web components of Commander4j are contained in the .war files which you download. You won't need all of them and their names may change with updated releases. | |||
The 2 servlets (.war) files shown below are intended to work on Zebra Mobile Computers which have the Zebra Enterprise Browser installed. | |||
{| class="wikitable" | |||
|+ Servlets | |||
|- | |||
! Servlet !! Purpose !!Environment !! Notes | |||
|- | |||
| '''c4j_web_react.war''' || Pallet Transactions || Any Mobile Browser || * Recommended | |||
|- | |||
| '''c4j_web_WS.war''' || Quality - Product Grading || Any Mobile Browser|| Only needed for Quality Control || | |||
|- | |||
| '''c4j_web_Issue.war''' || Issue Pallets to Order & Location || Tablet Mobile Browser|| Issue/Return of Stock | |||
|} | |||
Installing the web element of Commander4j is very simple and requires you to copy 2 files from the Commander4j install directory into the Tomcat directory as follows. | Installing the web element of Commander4j is very simple and requires you to copy 2 files from the Commander4j install directory into the Tomcat directory as follows. | ||
*Stop the Apache Tomcat service if it is running. | *Stop the Apache Tomcat service if it is running. | ||
*Copy the file | *Copy the file '''chosen_servlet.war''' which will be found in the Commander4j directory into WebApps subdirectory of the Tomcat installation directory.<br > | ||
*Start the Apache Tomcat Service. | *Start the Apache Tomcat Service. | ||
*You should then notice that the | *You should then notice that the '''chosen_servlet''' directory has been created under WebApps. | ||
*Now update the list of hosts that the web application can connect to by :- | *Now update the list of hosts that the web application can connect to by :- | ||
*Copy (overwrite) the existing hosts file by copying "Commander4j/xml/hosts/hosts.xml" into "Tomcat/WebApps/ | *Copy (overwrite) the existing hosts file by copying "Commander4j/xml/hosts/hosts.xml" into "Tomcat/WebApps/'''chosen_servlet'''/xml/hosts" | ||
*You can now confirm that this is working by opening the url http://servername:8080/ | *You can now confirm that this is working by opening the url '''http://servername:8080/chosen_servlet/''' | ||
*If you need to update the hosts.xml file for a servlet you will need to either restart the Apache Tomcat service or stop and start the servlet from the [http://localhost:8080/manager/html Apache Tomcat Manager] | |||
*If you want to connect to a SQL Server database using Windows Integrated Authentication you will need to copy the appropriate version of the auth dll from the downloaded MS JDBC drivers (e.g. mssql-jdbc_auth-12.10.0.x64.dll) into the Java bin folder. | |||
== Create Commander4j Services == | == Create Commander4j Services == | ||
| Line 103: | Line 134: | ||
== Install Local Middleware == | == Install Local Middleware == | ||
== Install Print Queues == | == Install Print Queues == | ||
[[Printer Queues]] | |||
Latest revision as of 08:09, 12 August 2025
Install Database
Commander can work with mySQL, MSSQL or Oracle databases. Without going into the specifics of how each database product works the following is a checklist of what needs to be done in order to prepare the database for use with Commander4j.
General recommendations. If we assume that your just wanting to get the application working with the least amount of work then I would recommend installing SQL Server Express for Windows based computers. For MacOS I would recommend mySQL and for Linux you have the choice of mySQL or Oracle. To be accurate most databases will work with most operating systems using Docker these days - but in the interest of simplicity I would use the previous recommendations. Apologies to any Oracle DBA's out there but I would not recommend it unless you have a lot of previous experience.
mySQL
A detailed guide showing how to install mySQL under windows can be found here.
- Create a database/schema user account for Commander4j to use.
- Create a user which has the newly created database as it's default schema.
- Ensure that the new user has sufficient permissions to create tables/indexes/views etc.
- Better to grant too much rather than too little initially.
- Ensure that the database is using TCP/IP (SQL Server).
- Ensure that the database is accepting remote connections (All)
- Ensure that the user is allowed to connect remotely (mySQL)
MariaDB
Installation is fundamentally as per mySQL - however when you use the Setup4j program within Commander4j you need to make sure you select the following settings.
Collation      utf8mb4_general_ci
 Char Set      utf8mb4
Microsoft SQL Server
A detailed guide showing how to install MS SQL Server under windows can be found here
- Enable the TCP/IP communication protocol as it maybe disabled by default.
- Create a database/schema user account for Commander4j to use.
- Create a user which has the newly created database as it's default schema.
- Ensure that the new user has sufficient permissions to create tables/indexes/views etc.
- Better to grant too much rather than too little initially.
- Ensure that the database is accepting remote connections (All)
- Check firewall rules allow for connections
- Ensure that the user is allowed to connect remotely (mySQL)
Oracle
A detailed guide showing how to install Oracle under windows can be found here.
- Create a database/schema user account for Commander4j to use.
- Create a user which has the newly created database as it's default schema.
- Ensure that the new user has sufficient permissions to create tables/indexes/views etc.
- Better to grant too much rather than too little initially.
- Ensure that the database is using TCP/IP (SQL Server).
- Ensure that the database is accepting remote connections (All)
- Check firewall rules allow for connections
Install Java
- Java 21 is needed if you're installing
- Desktop Application into a Linux operating system.
- Web components onto a server using Apache Tomcat.
Note that the web applications should be installed on a nominated server machine and not on workstations
Recommend installing the JDK.
Install Tomcat 11.x
- Download from Apache Tomcat Site
Ensure you download the 32/64Bit Windows Service Installer package.
Install Commander4j
- Obtain the required installation package.
This can be downloaded from Commander4j Website On a server select the "Full" install option from the setup screen - normally a users PC will require the "Workstation" install.
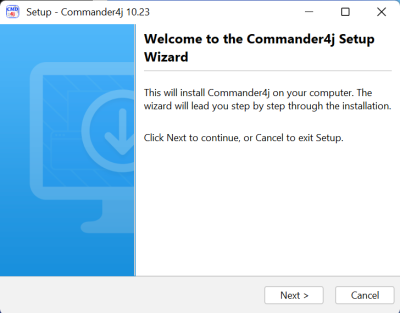
Run the appropriate installer for your operating system.
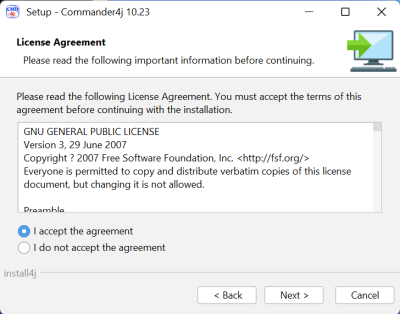
Review and agree the licence agreement.
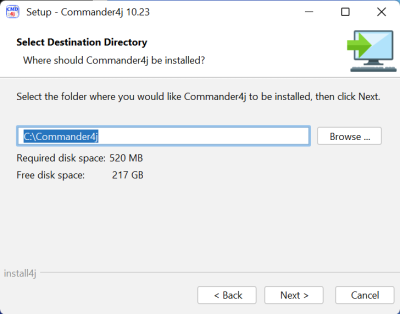
Select the install destination.
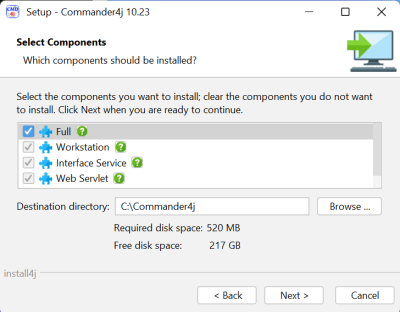
Choose the appropriate install type.
Select Full if your installing the main machine (server) which will run the interfaces and select Workstation for every other machine.
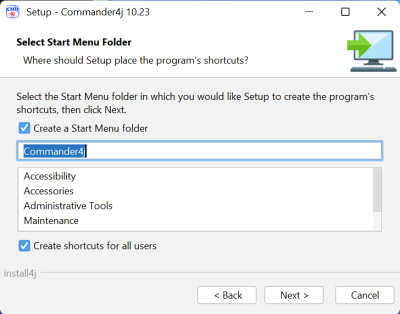
Amend the name of the folder shortcut if needed. Typically you would change the name if you wanted to install more than one copy of the software on the same computer.
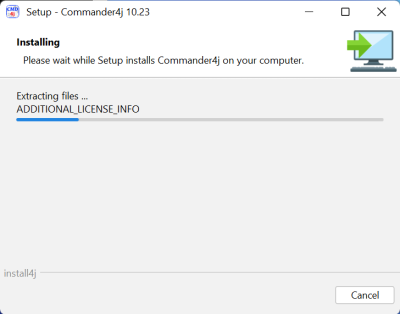
Allow the installer to copy files to the destination.
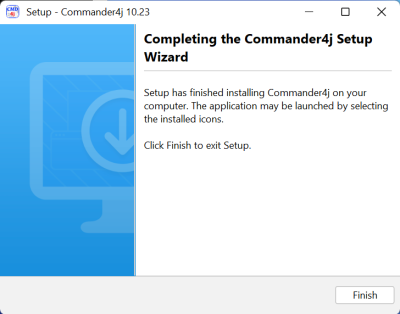
The software is now installed.
Configure Commander4j
- Setup Hosts (Database Connections)
When commander is initially installed you will find a number of dummy database connections are already defined. You may find it easier to amend one of these rather than create a new connection. To manage the database connections you should run Setup4j from the Commander4j program shortcuts.
Configuration
The 1st step is to install and/or identify the database software that you plan to use with Commander4j. As mentioned previously this can be mySQL, Microsoft SQL Server (including SQL Express) or Oracle (including XE).
Configure Tomcat / Web Application
The web components of Commander4j are contained in the .war files which you download. You won't need all of them and their names may change with updated releases.
The 2 servlets (.war) files shown below are intended to work on Zebra Mobile Computers which have the Zebra Enterprise Browser installed.
| Servlet | Purpose | Environment | Notes | |
|---|---|---|---|---|
| c4j_web_react.war | Pallet Transactions | Any Mobile Browser | * Recommended | |
| c4j_web_WS.war | Quality - Product Grading | Any Mobile Browser | Only needed for Quality Control | |
| c4j_web_Issue.war | Issue Pallets to Order & Location | Tablet Mobile Browser | Issue/Return of Stock |
Installing the web element of Commander4j is very simple and requires you to copy 2 files from the Commander4j install directory into the Tomcat directory as follows.
- Stop the Apache Tomcat service if it is running.
- Copy the file chosen_servlet.war which will be found in the Commander4j directory into WebApps subdirectory of the Tomcat installation directory.
- Start the Apache Tomcat Service.
- You should then notice that the chosen_servlet directory has been created under WebApps.
- Now update the list of hosts that the web application can connect to by :-
- Copy (overwrite) the existing hosts file by copying "Commander4j/xml/hosts/hosts.xml" into "Tomcat/WebApps/chosen_servlet/xml/hosts"
- You can now confirm that this is working by opening the url http://servername:8080/chosen_servlet/
- If you need to update the hosts.xml file for a servlet you will need to either restart the Apache Tomcat service or stop and start the servlet from the Apache Tomcat Manager
- If you want to connect to a SQL Server database using Windows Integrated Authentication you will need to copy the appropriate version of the auth dll from the downloaded MS JDBC drivers (e.g. mssql-jdbc_auth-12.10.0.x64.dll) into the Java bin folder.
Create Commander4j Services
See Install Interface Services