Interface Admin: Difference between revisions
No edit summary |
No edit summary |
||
| Line 53: | Line 53: | ||
[[file:Interface_Admin4.png|link=|800px]] | [[file:Interface_Admin4.png|link=|800px]] | ||
The interfaces can be run from within the Desktop application for testing by using the [[Process | The interfaces can be run from within the Desktop application for testing by using the [[Process Messages]] option but you would normally run them as a background process (service in Windows). See [[Install Interface Services]] | ||
Latest revision as of 16:45, 25 August 2024
The interfacing functionality is very flexible and comes in 2 main parts. The core Commander4j application and its own standard xml interface messages which you can use. However it's likely that you would probably be exporting data from another system in whatever format that provides. To help bridge the gap between two incompatible systems you should consider using a middleware application. Commander4j as a separate free open source Middleware4j which has a number of sample message transformations included within it. You could for example read a CSV file from your ERP solution and use middleware to convert it into an XML message for Commander4j. Likewise you could take an output message from Commander4j and convert it into a flat ascii file for your ERP system.
Click on the Utilities link for a list of associated utilities which may prove useful.
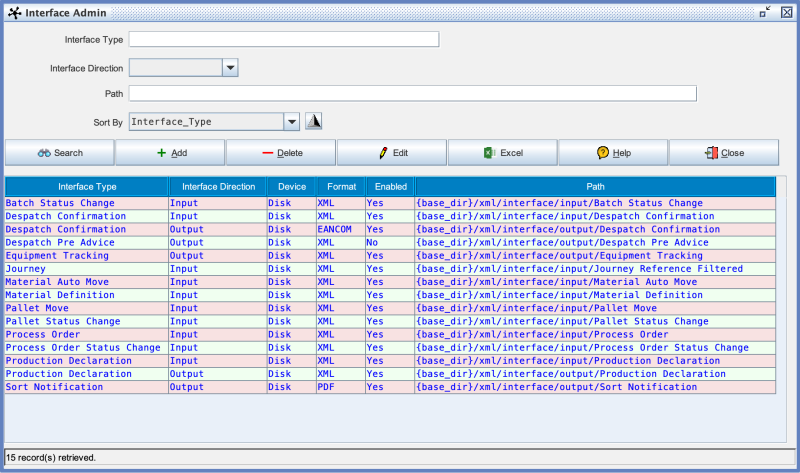
The Interface Admin screen allows you to setup both inbound and outbound messages within Commander4j. An example of a message which might be going into C4J from an external system (inbound) would be Material Master and/or Process Order.
An example of a output (outbound) message would be a Production Declaration - a message to an external system to tell it that a pallet has been made.
Example Production Declaration Message
<?xml version="1.0" encoding="UTF-8"?>
<message>
   <hostRef>VALIVE</hostRef>
   <messageRef>384133180125000029 2024-01-25T10:29:05</messageRef>
   <interfaceType>Production Declaration</interfaceType>
   <messageInformation>SSCC=384133180125000029</messageInformation>
   <interfaceDirection>Input</interfaceDirection>
   <messageDate>2024-01-25T10:29:07</messageDate>
   <messageData>
       <productionDeclaration>
           <SSCC>384133180125000029</SSCC>
           <productionQuantity>0039</productionQuantity>
           <productionUOM>UNI</productionUOM>
           <expiryDate>2025-07-27T00:00:00</expiryDate>
           <productionDate>2024-01-25T10:29:05</productionDate>
           <batch>4025094774</batch>
           <processOrder>094774</processOrder>
           <confirmed>Y</confirmed>
       </productionDeclaration>
   </messageData>
</message>
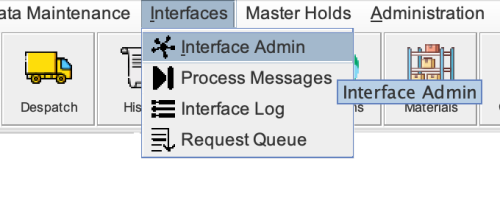
The Interfacing menu options can be accessed using the menu shown below. However you should note that some messages will require additional settings in other screens. Continue reading for more information.
The Admin screen below allows you to add or remove message types.
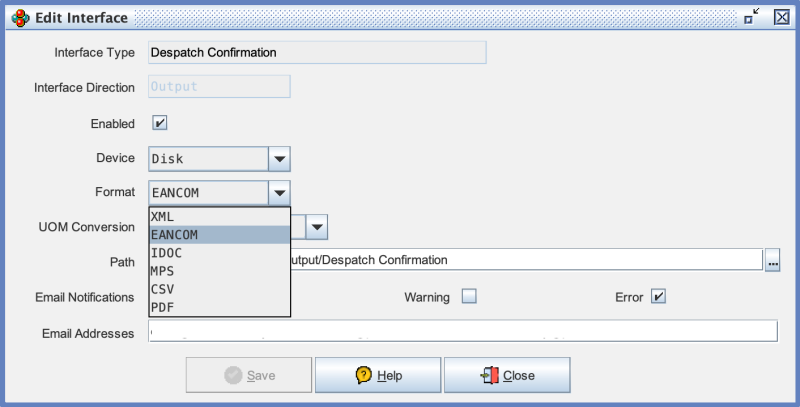
If you look at the settings for a message you will see a simple screen which specifies the input or output path where the messages will be located. Most messages will be in XML format which is the most flexible format. The Despatch message can also support EANCOM as shown here.
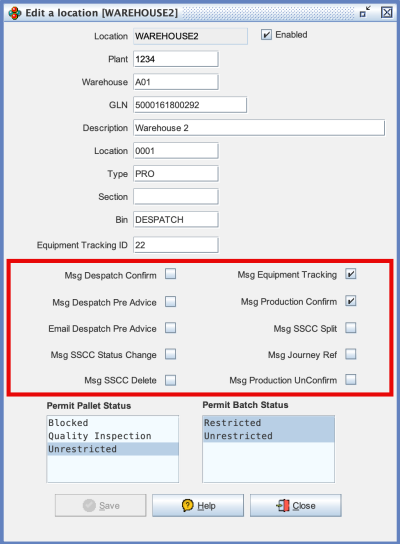
Some messages will only be produced if they meet additional criteria. If you look at the Locations table for example you will see there are a number of checkbox's which determine of a message will be produced for that location.
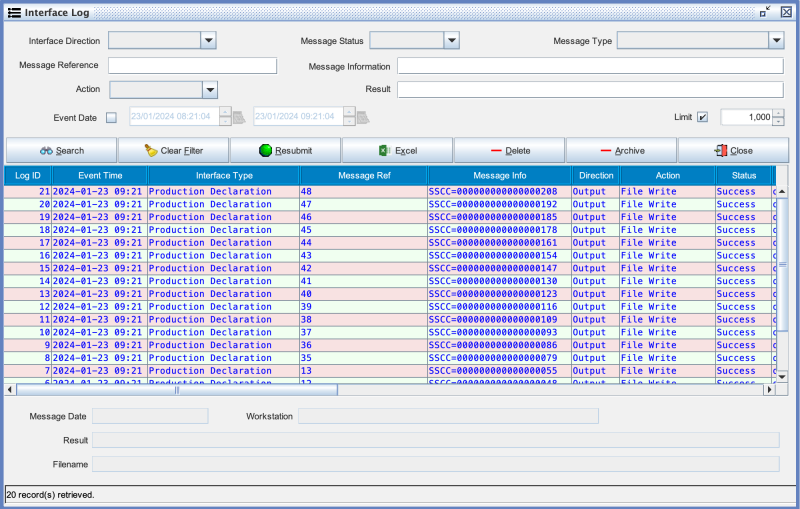
You can monitor the status of messages using the Interface Log screen.
The interfaces can be run from within the Desktop application for testing by using the Process Messages option but you would normally run them as a background process (service in Windows). See Install Interface Services